Thanks to the creative genius of one Queenbee, this blog is now better than before. The prettyasaflower blog team has had a name and website change! We are now called Sassy’s Southern Kitchen! Feel free to visit us at sassyssouthernkitchen.wordpress.com, and don’t hesitate to lavish the comment section with thoughts, ideas, and constructive criticism.;)
Lemon White Chip Sugar Cookies
Lemon White Chip Sugar Cookies was a recipe that evolved as it went, I started out making regular sugar cookies, then had a burst of creativity, thus causing me to add lemon zest and chocolate chips. This is a quick cookie recipe that you could throw together at the last minute if you had to. Say you suddenly find out that you have friends coming over for dinner, so you throw together a meal and remember that you have neglected dessert, so what to do? Make cookies of course! They are quick, easy, and one of the most universally loved desserts. These cookies only take twenty minutes total to put together, less if you do not refrigerate the dough. As to the type of chocolate chips you use, white chocolate is traditional, but this time around I made them with semi-sweet and found the stronger chocolate flavor to be a nice contrast to the subtle hint of lemon. However, if you prefer to follow the recipe rather than branching out on your own, use white chocolate chips. This episode of Delicious Food 101 features The Chef, La Critico, Friar Tyst, and the Health Inspector.
The Chef: “Friar Tyst, what do you think about these cookies?” Friar Tyst: “Well they’re real good.” The Chef: “I’ve always thought that it’s funny how your opinions are simple in their delivery, yet accurate in their true portrayal of your thoughts.” Friar Tyst: “Huh?”
The Chef: “La Critico, would you like a cookie?” La Critico: “Well I wouldn’t turn one down.” The Chef: “Therefore one would assume that you like them?” La Critico: “Well they’re pretty good little cookies.”
The Ingredients: 2 to 2 1/2 cups of cake flour, 1/2 cup softened butter, 1 cup granulated sugar, 1/2 cup raw cane sugar, 1 egg, 1 to 2 tsp. lemon zest, 1 tsp. baking powder, 1 tsp. salt, 1/2 to 3/4 cup semisweet or white chocolate chips.
Using a hand mixer, cream together butter and sugar in a large mixing bowl. Add half of the flour and the egg, mix until combined. Add the lemon zest, the remaining flour, baking powder, and salt, mixing until just combined. Fold in the chocolate chips by hand. Preheat your oven to 350 degrees; refrigerate the dough while the oven is preheating. When the oven is preheated roll the dough into two inch balls, placing them onto a greased cookie sheet. Bake for 8-10 minutes. Makes one and a half dozen.
These are on the small side, meaning they disappear even faster!
Independence Day Cheesecake
Happy Independence Day America! I’m so grateful that this was a holiday weekend for two reasons: One: We just picked a bunch of fresh blueberries that needed to be used. Two: A summer holiday gives me an excuse to make cheesecake! This blueberry cheesecake is simply delicious, the fresh blueberries add just the right mix of tang and pizzazz. And because this dessert contains fresh fruit, it is instantly healthy and contains absolutely no calories! Sigh, in my dreams at least, not in the mirror….In the past I’ve found that some people like their cheesecake really sweet, others like it plain and simple, then there are those of us who have mastered just the right flavor balance between plain and sweet. A truly good cheesecake is one that is mildly sweet, and OH SO CREAMY…….May I just take this moment to relish in the glory of the Kitchen-Aid hand mixer? Yes? Thank you. I mean come on, that thing is one in a million. It makes this cheesecake dangerously creamy and perfectly smooth. There is nothing like having a good hand mixer, it is your friend, your comrade, and your all-around wonder tool. There is nothing it can’t do! Enough about kitchen tools, let us use them to create!
The Ingredients: 16 oz. softened cream cheese, 16 oz. softened whipped topping, 2 cups graham cracker crumbs, 1 stick melted butter, 1 1/2 cups powdered sugar, 1/2 cup fine grain organic sugar, 1 cup fresh blueberries.
Mix together the graham cracker crumbs and melted butter with a fork in the bottom of a casserole pan or baking dish. Press it flat and make sure there are no lumps. Refrigerate while you make the filling. Add the softened cream cheese to a large mixing bowl, mix on high speed with your hand mixer until smooth. Gradually add in the whipped topping and sugar(s), mixing on medium speed between additions. Mix on high for an additional five minutes or so. When the filling is thick, smooth, and lusciously creamy, spread it evenly atop your crust and refrigerate for a few hours until chilled. Serves 8-10 (depending on who is serving it);).
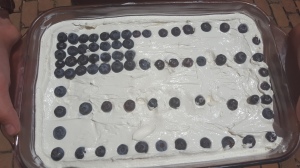
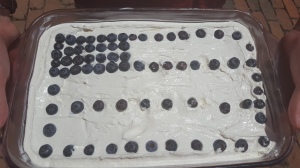
Disclaimers: I know the flag isn’t perfect, only perfectionists can make a perfect flag. Ignore the many holes where fingers tasted the filling, they add character and a rustic flair. At least that’s what I tell myself. If I hadn’t decided to take this photo in the sunlight you never would have been able to see them.;)
And there she is! A perfectly imperfect cheesecake!
Dairy-Free English Scones
As they are basically a combination between a biscuit and a scone, English scones are in a category all their own. These are unlike any scones I have ever made, they look similar to a biscuit and even have a comparable texture, yet they do not taste the same. The texture, of course, will depend on how much baking powder you use, basically a rule of thumb (for me at least) is that more baking powder means lighter bread. Some use only two teaspoons in this recipe, while others use four, I used four and was not disappointed. It may seem like a lot at first, but its really not. My theory is that those who use two teaspoons like flatter, firmer scones, while those who use four like their scones to be more like a biscuit. As I was making this I was curious to see if replacing whole milk with coconut milk would cause the scones to turn out differently. I was pleasantly surprised to conclude that no, they do not really turn out any different. If anything, the coconut milk gives them a lighter, feathery texture, while the whole milk version is thicker and more chewy. Speaking from experience, these are soft with a delicious crust on the top, and pair very well with fruit jams, jellies, and even syrups! Believe me, I’ve tried all three…..:P This is not only a healthy, naughtily delicious bread to make for yourself, it is also a very impressive treat to serve your friends!
Disclaimer: The addicting quality of English scones may cause gluttony, therefore causing longer hours on the treadmill, this causing hunger, which leads to an even higher level of scone consumption…..an endless cycle of madness! You have been warned! But don’t let that stop you!
The Ingredients: 2 cups unbleached all-purpose flour, 1/4 cup granulated sugar, 4 tsp. baking powder, 6-8 tbsp. room temperature butter, 1 tsp. salt, 2/3 to 3/4 cup coconut milk, 1 egg, 2 additional tbsp. coconut milk.
Sift together the flour, sugar, baking powder, and salt into a large bowl. Add the sifted ingredients and the butter to the bowl of a food processor and pulse until there are no remaining chunks of butter, or until it has a sandy texture. Now add the mixture back into the mixing bowl. Make a well in the center and add 2/3 to 3/4 cup of coconut milk. Mix together gently with a fork or a rubber spatula. Just before the dough comes together, turn it out onto a floured surface and knead for one minute or until the dough forms a soft ball. Flatten the ball into a two to three inch thick disc. Preheat your oven to 400 degrees. Cut out the scones with a biscuit cutter, place on a greased baking sheet. Whisk together the remaining coconut milk and the egg. Using a pastry brush, brush the mixture onto each scone (there will most likely be some of the egg-milk mixture left over) Bake for about fifteen minutes, the scones are done when they are golden brown on top and soft, but no longer doughy in the center.
I will not look at the pictures, I will not look…at…the….pictures….Oh…I give up! The very sight of these scones causes uncontrollable mouth-watering desire! P.S. You can stuff the centers with Craisins if you want to!;)
Skinny Broccoli Cheese Soup
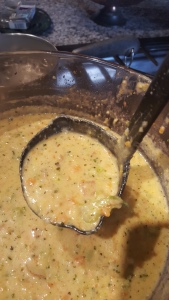
Ahhhh….soup, good in spring, summer, fall, and winter. Especially in fall and winter. However, when you are short on time and hungry for comfort food, this is the recipe for you. Skinny Broccoli Cheese Soup is a healthier option than the typical broccoli cheese soups that are loaded down with heavy cream and or half and half. Not that I have an aversion to half and half, it’s just a little too good to be considered healthy. Not that this dish isn’t good…well that got this post off to an awkward start. Ahem. In the past I have posted a few soup recipes that are good for those who are sensitive to lactose, and while this soup does contain some milk, you can easily omit the milk entirely and use only coconut milk. As long as you add a little extra cumin and or black pepper to cover up the coconut taste.;) Using a blend of cheeses gives this soup more flavor and color, making it an impressive looking dish to serve to both family and friends.
The Ingredients: 2 cups finely chopped broccoli florets, 1/2 to 1 cup matchstick carrots, 2 red potatoes or 1 small yellow onion, 1 cup evaporated milk, 3/4 cup coconut milk, 3 to 3 1/2 cups chicken or vegetable broth, 1/2 cup colby jack cheese, 1/2 cup sharp cheddar cheese, 1/4 cup Parmesan cheese (optional), 1/2 to 1 tsp. salt, 1/4 tsp. black pepper, 1 tsp. garlic powder, 1/4 to 1/2 tsp. cumin, 2/3 cup panko bread crumbs, 3 tbsp. butter.
Mince broccoli florets, dice potatoes or onion. Add 1 tbsp. of the butter and the diced potatoes to a medium to large soup pot over high heat. Saute for ten minutes, add the broccoli, carrots, and remaining butter. Saute for another ten minutes. Now add the chicken broth, evaporated milk, coconut milk, and spices. Stir well, reduce heat to medium low, and cook for fifteen to twenty minutes. Turn off the heat, stir in the cheeses and breadcrumbs and let sit for five minutes before serving.
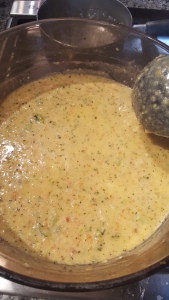
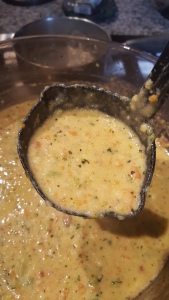
Soup+Cheese=comfort food….:)
Vegetarian Rice Pilaf
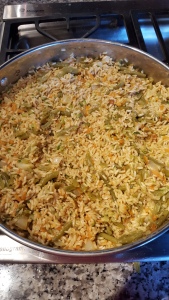
Rice is such a good item to have on hand, especially when you live a little farther from the grocery store then you would like…..It can be transformed into just about anything! For some, rice even visits the dessert category, blech, the very thought of rice pudding gives me a chill. It’s just so….so…ewwwww…..it takes a strong person to be able to down that mushy-gushy goo. In my book, rice should be a main or side dish, NOT a dessert. And who eats raisins with rice anyway? Vegetarian Rice Pilaf is an light, easy, and delicious side that pairs well with seafood, poultry, red meat, and is even good as a main dish! Not to mention that it provides you with an ample serving of veggies and grains to end the day right. This episode of Delicious Food 101 features The Chef, Queenbee, and La Critico.
The Chef: “Queenbee, how do you like the rice pilaf?” Queenbee: “I do not usually enjoy rice dishes, but this one is really good.” The Chef: “I shall consider this as high praise.”
The Chef: “La Critico, do you enjoy rice dishes?” La Critico: “Well they’re better than some things.” The Chef: “Ummm…okay?” La Critico: “Did you make us some corn cupcakes?” The Chef; “I made cornbread.” La Critico: “(tasting it) Well this is some pretty good mash.” The Chef: “I can always count on you for objective criticism at the highest level.”
The Ingredients: 2 cups whole grain brown rice, 1 large zucchini, 1 cup of matchstick carrots or 1 cup of grated carrots, 1/4 to 1/2 of a yellow onion, 1 cup halved green beans (fresh or canned), 1 tsp. salt, 1/2 tsp. basil, 1/4 to 1/2 tsp. black pepper, 1/2 tsp. cumin, 1 chicken tomato bouillon, 2 tbsp. butter.
Bring a large pot of water to a boil, add the bouillon and rice. Cook for fifteen to twenty minutes. Melt butter in a large saucepan, add the onion, cook until translucent. Grate the zucchini while the onion cooks. Add the cooked rice, carrots, zucchini, and green beans to the saucepan. Stir well. Add the spices, mixing as you go. Turn the heat to low and let sit until you are ready to serve.
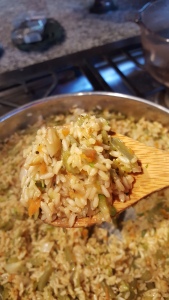
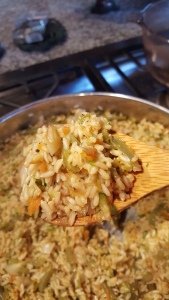
Who knew that a rice dish could be so colorful?
The Best Cheesy Garlic Breadsticks
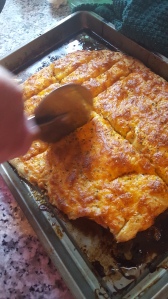
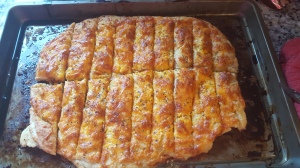
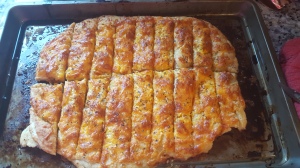
I would like to share with you a sinfully delicious recipe that I recently made, CHEESY GARLIC BREADSTICKS.:) This post is for you fellow lovers of bread, and cheese, and cheese covered bread…..sigh, there goes my fitness plan. When I sent a picture of these to my really good friend/sister her word for word response was “Oh Man! Are those on your blog!? They should be!”. Boy was she right, I was almost afraid to post this recipe because of the instant addiction/gluttony that will occur upon consumption. But then I decided to share the love/put the recipe down on paper so that it will be ingrained into the sacred hall of Best Recipes Ever. Sooooo…..as a disclaimer I’d like to say: “I apologize in advance for this.” Ahem, anyway, in the past I attempted to make healthy breadsticks, but…..let’s just say that didn’t end well. However, THESE breadsticks are SO GOOD that they are better than anything you can buy in the grocery store or a restaurant. And, they contain wheat flour! Which covers all wrongs! Seriously though, once you discover how simple they are to create, there is no going back. All you need is desire, know-how, and a reliable timer so that the food doesn’t burn. All of that aside, the smell of these babies permeates the entire house, so you’ll know the very minute that they have finished becoming wonderful.
Cooking Tip: If you have the time, turn the oven on and off a couple of times during the rising process, for some weird reason this makes the finished dough larger.
The Ingredients: (write these on your brain) 1 to 1 1/2 cups unbleached all purpose flour, 1 cup whole wheat pastry flour, 1 packet fast rising yeast, 1 cup warm to lukewarm water, 1/2 cup sharp cheddar cheese, 1/2 cup Colby Jack cheese, 3-4 tbsp. butter, 1 tbsp. sugar, 1 tbsp. garlic salt (if you do not have garlic salt, simply mix equal amounts of garlic powder and salt and measure out a tablespoon for this recipe), 1 tsp. garlic powder, 1 tbsp. Parmesan (the sprinkly kind), 1 tsp. Italian Seasoning, 1 tsp. basil, 1 tbsp. olive oil.
Add flour(s), sugar, garlic salt, and yeast to a mixing bowl. Whisk until combined. Slowly add the water while mixing constantly with a wooden spoon. Mix until the dough becomes too thick to stir by hand. When this happens, flour your nearby cooking surface and knead the dough with your hands for one minute or until it forms a soft ball. Rinse out your mixing bowl with water, dry it thoroughly, use the olive oil to grease the bowl. Put the ball of dough into the bowl, cover it with a towel, and let it rise at 170 degrees in your oven for one hour.
When the rising time is done, preheat your oven to 425 degrees. Meanwhile, melt the butter, italian seasoning, and garlic powder together in a microwave safe bowl or cup, stir well. Add the parmesan to the melted butter, stir well. Flatten the dough into a rectangle, brush the butter mixture over the top. Now sprinkle the cheeses evenly over the butter mixture. Flattening into a even layer. Bake for 15-17 minutes. Remove from the oven, cut into sticks, and garnish with fresh or dried basil before serving (optional).
The very sight is too much for my tastebuds! Too much I say!
Western Egg Wrap
This Western breakfast wrap is not just a meal, it’s an experience. Shortly after completing my recently begun morning workout session, I received a burst of inspiration from the heavens to create an unexpectedly delicious breakfast food that would please even the pickiest palate. For those of you who have to rush off to work and think that you don’t have time for such delicacies, think again! This breakfast is just as good made the night before and reheated in the morning. Just imagine, all night you can dream of that little scrumptiousness awaiting you for breakfast! Not only is it good, it’s good for you! Since when can you combine eggs, veggies, and real cheese all in one breakfast? Unless it’s a omelet, that is to say……but anyway, that is another story for another time. As you can see, my little not-by-choice sabbatical from this blog is over, and I am back baby! I am back! I’m so excited to finally be moved in and settled!!!!:D I know you couldn’t tell…..;)
The Ingredients: 1 whole wheat tortilla, 1 egg, 1 Campari tomato, 1/4 cup sharp cheddar cheese, 2 tbsp. softened butter.
Break the tomato into small pieces with a fork, discard the top. Melt 1/2 tbsp. of the butter in a small frying pan over medium heat. When the butter has melted, add the egg, stirring slowly but steadily to scramble it. Just before the egg is fully cooked, add the tomato bits. Turn the heat to low and let sit for a few minutes. Spoon the cooked egg and tomato goodness onto the tortilla, spreading it out in a straight line. Carefully roll the tortilla around the contents. Add half of the remaining butter to the pan, turn the heat back up to medium. Toast the tortilla on that side, then add the rest of the butter and toast it on the other side. Hurrah! You are done! Now, instead of scarfing it down, take time to enjoy the delicious natural flavors…..or you could just eat it like a normal person…..
Disclaimers for those of you who are bothered by my unprofessionalism: Ignore the bits of brown, burnt cheese that leaked out of the wrap, I may have gotten a little carried away….. Ignore the terrible lighting in these photos, I was hungry, okay!? Please overlook the fact that I am not up to restaurant cleanliness standards. Look fondly upon my sister’s red-haired Barbie doll lying in the background, it is well loved.
Ahhhhh…..this was SO GOOD……
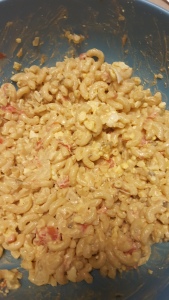
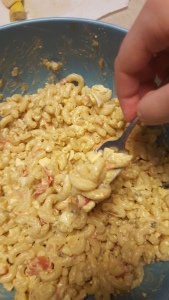
Caramelized Vegetable Macaroni Salad
Now that summer is officially here, everyone is taking over the outdoors, enjoying nature to the fullest. After a long day of summer play, no one wants to come home and sweat over a hot stove….sooooo…why not put together a simply delicious pasta salad before you leave, and come home to a ready made, cool, flavorful dinner that everyone loves? As my family is still on the go, moving into a new place and all that jazz, these types of quick, delicious meals are so handy right now. In short, Caramelized Vegetable Macaroni Salad is light, fresh, and packed with nutrition. This episode of Delicious Food 101 features The Chef and La Critico.
The Chef: “La Critico, what do you think of this pasta salad?” La Critico: “Well it’s real good I guess.” The Chef: “Well I try.” La Critico: “I wouldn’t eat anything but pasta if I had the choice.” The Chef: “Same here, but that would not bode well towards a healthy lifestyle.”
The Ingredients: 1 lb. macaroni noodles, 1 large tomato, 4-6 green onions or 1/2 yellow onion, 1/2 cup mayonnaise or sour cream, 2 tbsp. sriracha ranch dressing, 1 tbsp. spicy brown mustard, italian seasoning, salt, pepper, garlic, 2 tbsp. butter.
Bring a large pot of water to a boil, add the noodles and butter. Now, this is very important: DO. NOT. OVERCOOK THE NOODLES. They must be al dente or the salad will be ruined. While the noodles are boiling, dice the tomato and whichever onion you choose. If using yellow onion, caramelize in butter for ten minutes, adding the tomato to the pan during the last few minutes. If using green onions, saute the green onions and tomato in butter for five minutes. Mix together the cooked vegetables and pasta, then add all remaining ingredients. Refrigerate the pasta salad until you are ready to serve it. Enjoy!
This is the version that has yellow onion, and boy was it good! There was not a noodle left when dinner was over…..
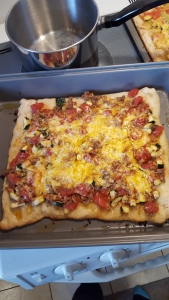
Turkey Veggie Pizza
Pizza is great for when you need a quick grab and go dinner that requires little prep and a short cooking time. Now, ground turkey is not something that you would normally think of to use as a pizza topping, but…..Recently we made this recipe and it turned out as a light, flavorful version of a meat lovers pizza. So if you like meat, but want to cut down a little, while still enjoying your favorite foods, make this! Friar Tyst, El Gastronomo, and La Critico certainly enjoyed it….:) If you want to make your own pizza crust, that’s fine….but…I’ve always found that refrigerated pizza dough is much more convenient and user-friendly. This episode of Delicious Food 101 features The Chef, La Critico, El Gastronomo, and Friar Tyst.
The Chef: “Friar Tyst, you being a turkey expert, do tell us your opinion of this dish.” Friar Tyst: “Well it’s real good when you add some rosemary during the cooking process.” The Chef: “Hmmmm, good to know. I assume that you like this pizza better than that other one I make?” Friar Tyst: “Oh yeah.”
The Chef: “La Critico, do illuminate us with your superior criticism.” La Critico: “Well it’s better than a Burger King burger.” The Chef: “Really settin’ your standards high, ain’t ya?” La Critico: “It’s better than Little Ceasars.” The Chef: “Hmmmm….”
The Chef :”El Gastronomo, please tell me you have higher standards than this peasant?” El Gastronomo:”This is really good.” The Chef: “It did turn out good, didn’t it?.”
The Ingredients: 1 cup cooked ground turkey, 15 oz. diced tomatoes, 1 cup Colby jack or pepper jack cheese, 1 tube Kroger refrigerated pizza dough, 1/2 cup diced yellow onion, 1 minced zucchini, 1 tsp. basil, 1/2 tsp. salt, 1/2 tsp. crushed black peppercorns, 1/2 tsp. cumin.
Roll the pizza crust out into a rectangular shape. Bake at 370 degrees for eight to ten minutes. Mix the spices and the tomatoes together in the measuring cup, spread evenly atop the crust. Cook the onion and the turkey together. Spread the turkey and onions atop the sauce, the minced zucchini on top of that, and finish with the cheese. Bake for an additional six to eight minutes.
Who needs takeout pizza?

